 FlaskConnect™
Home › Apparatus gallery › Workup and purification
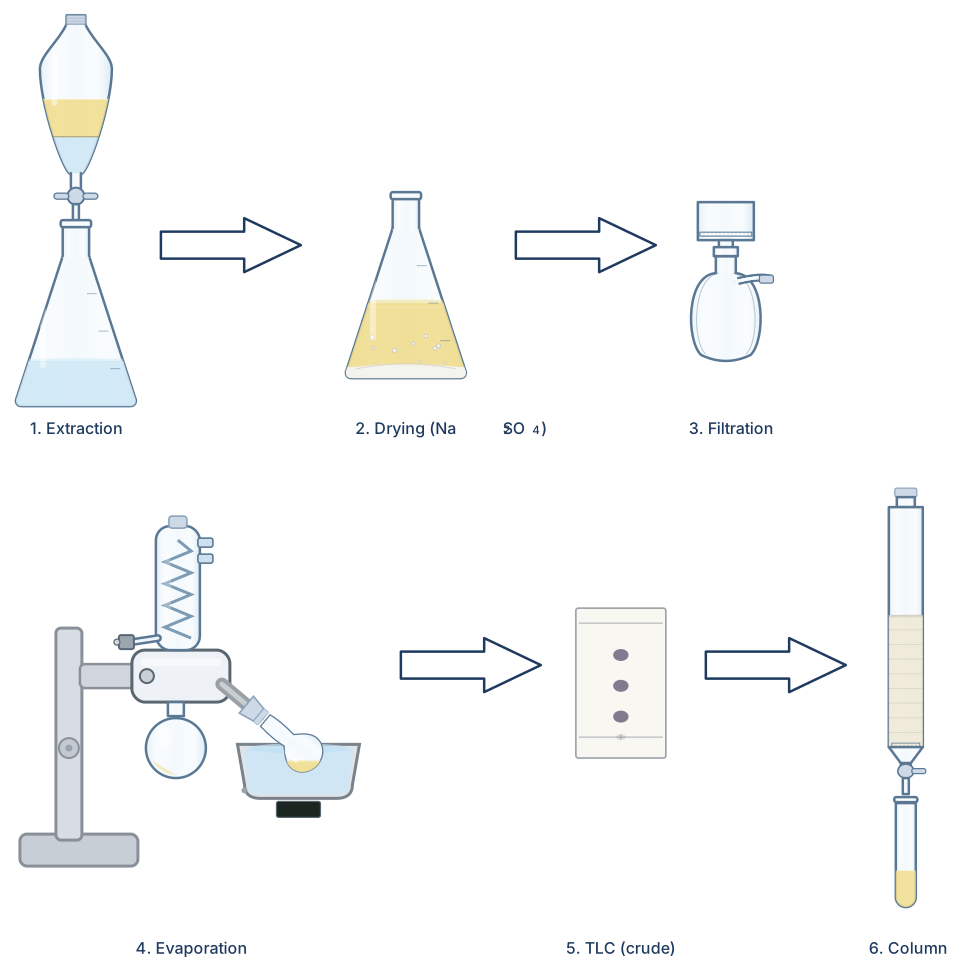
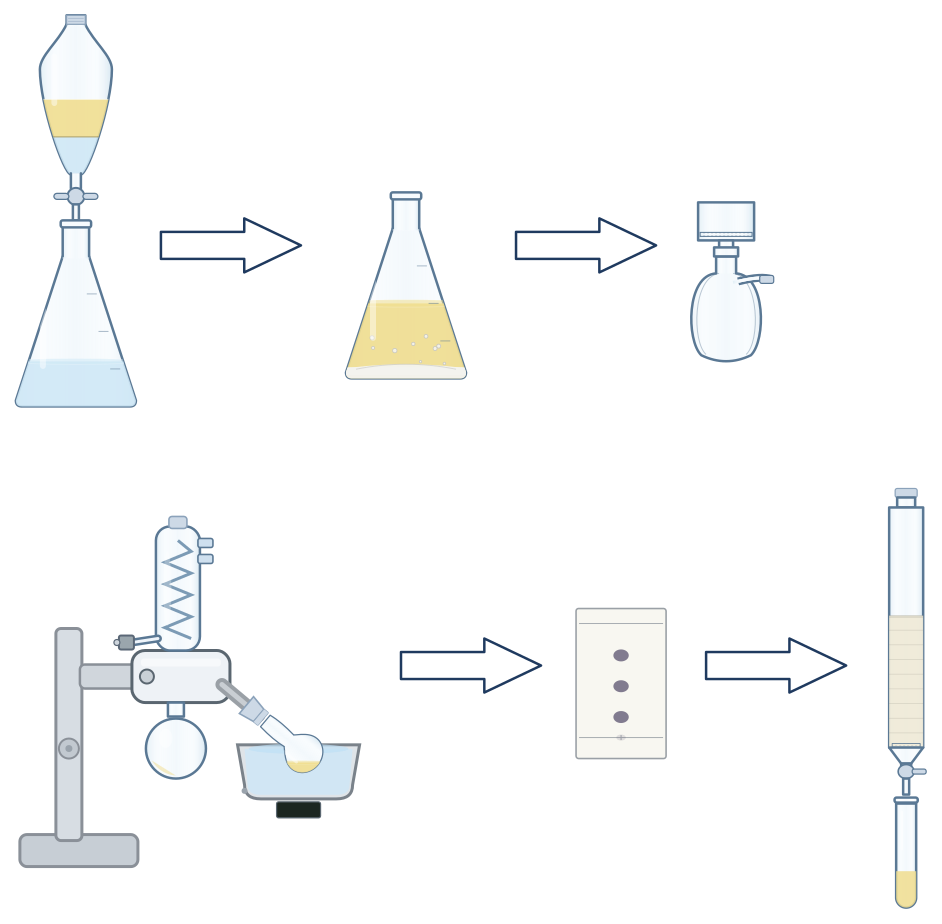
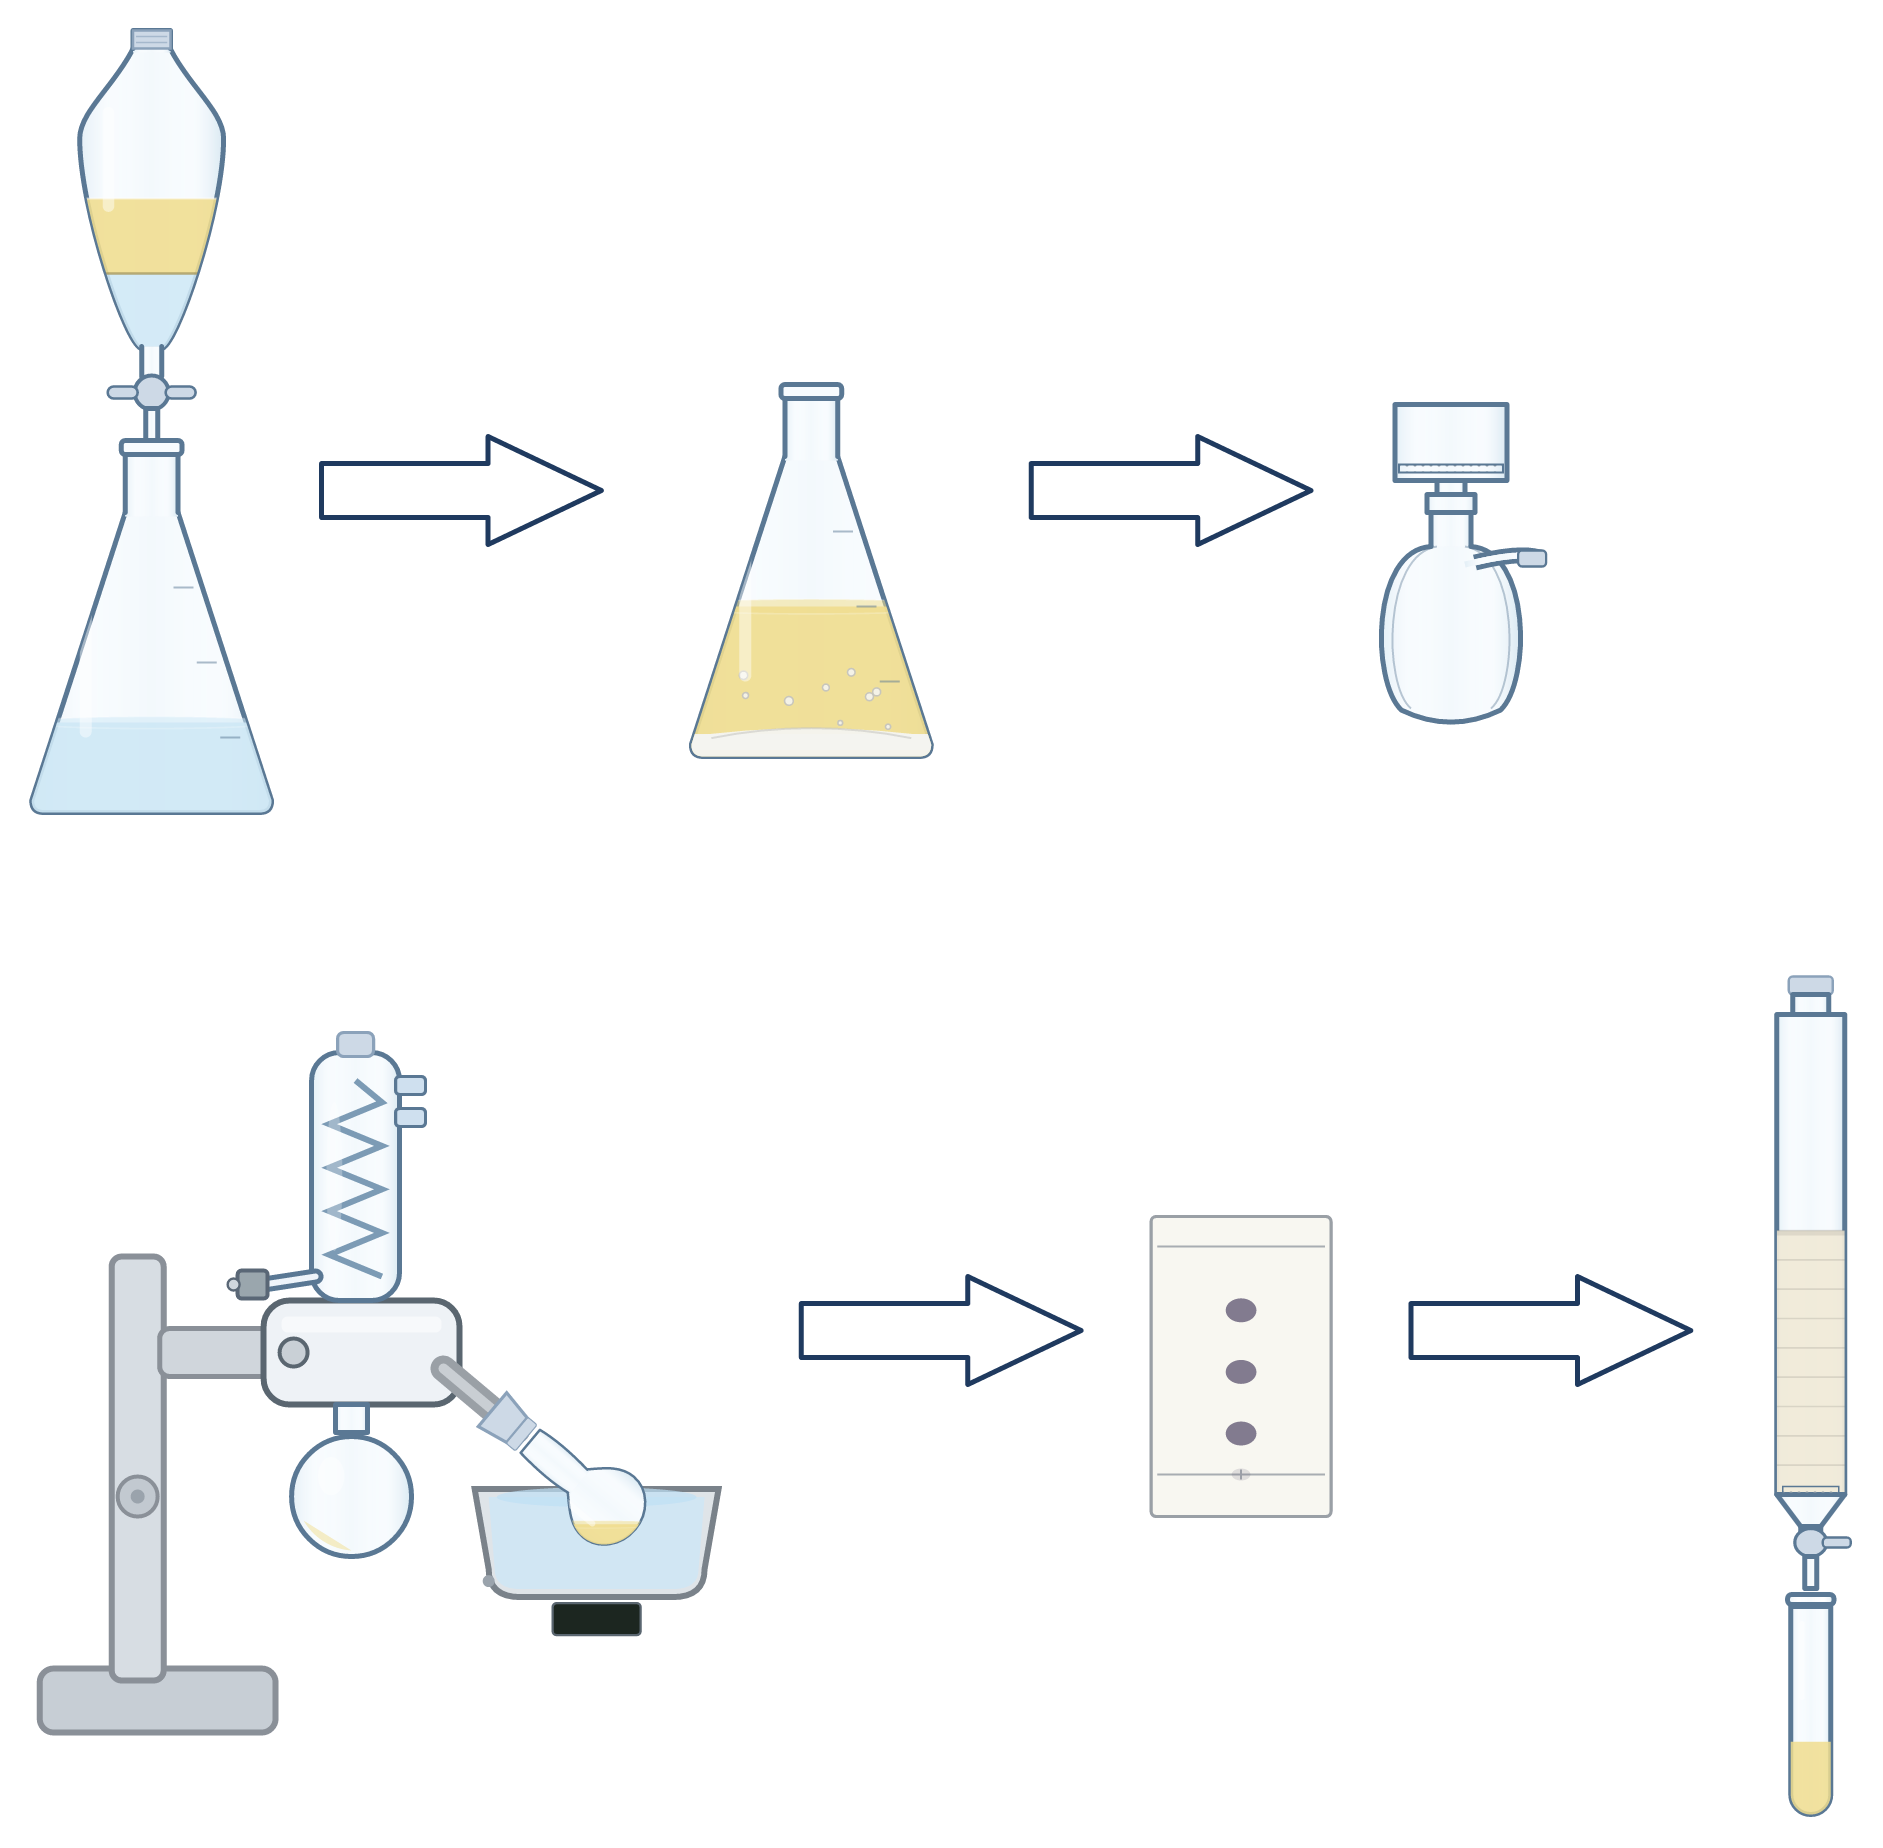
Workup and Purification Flow Diagram (Extraction to Column)
A single diagram of the steps from reaction workup (extraction, drying, filtration, evaporation) to purification (TLC, column). Use it as a procedure figure in lab reports and slides.
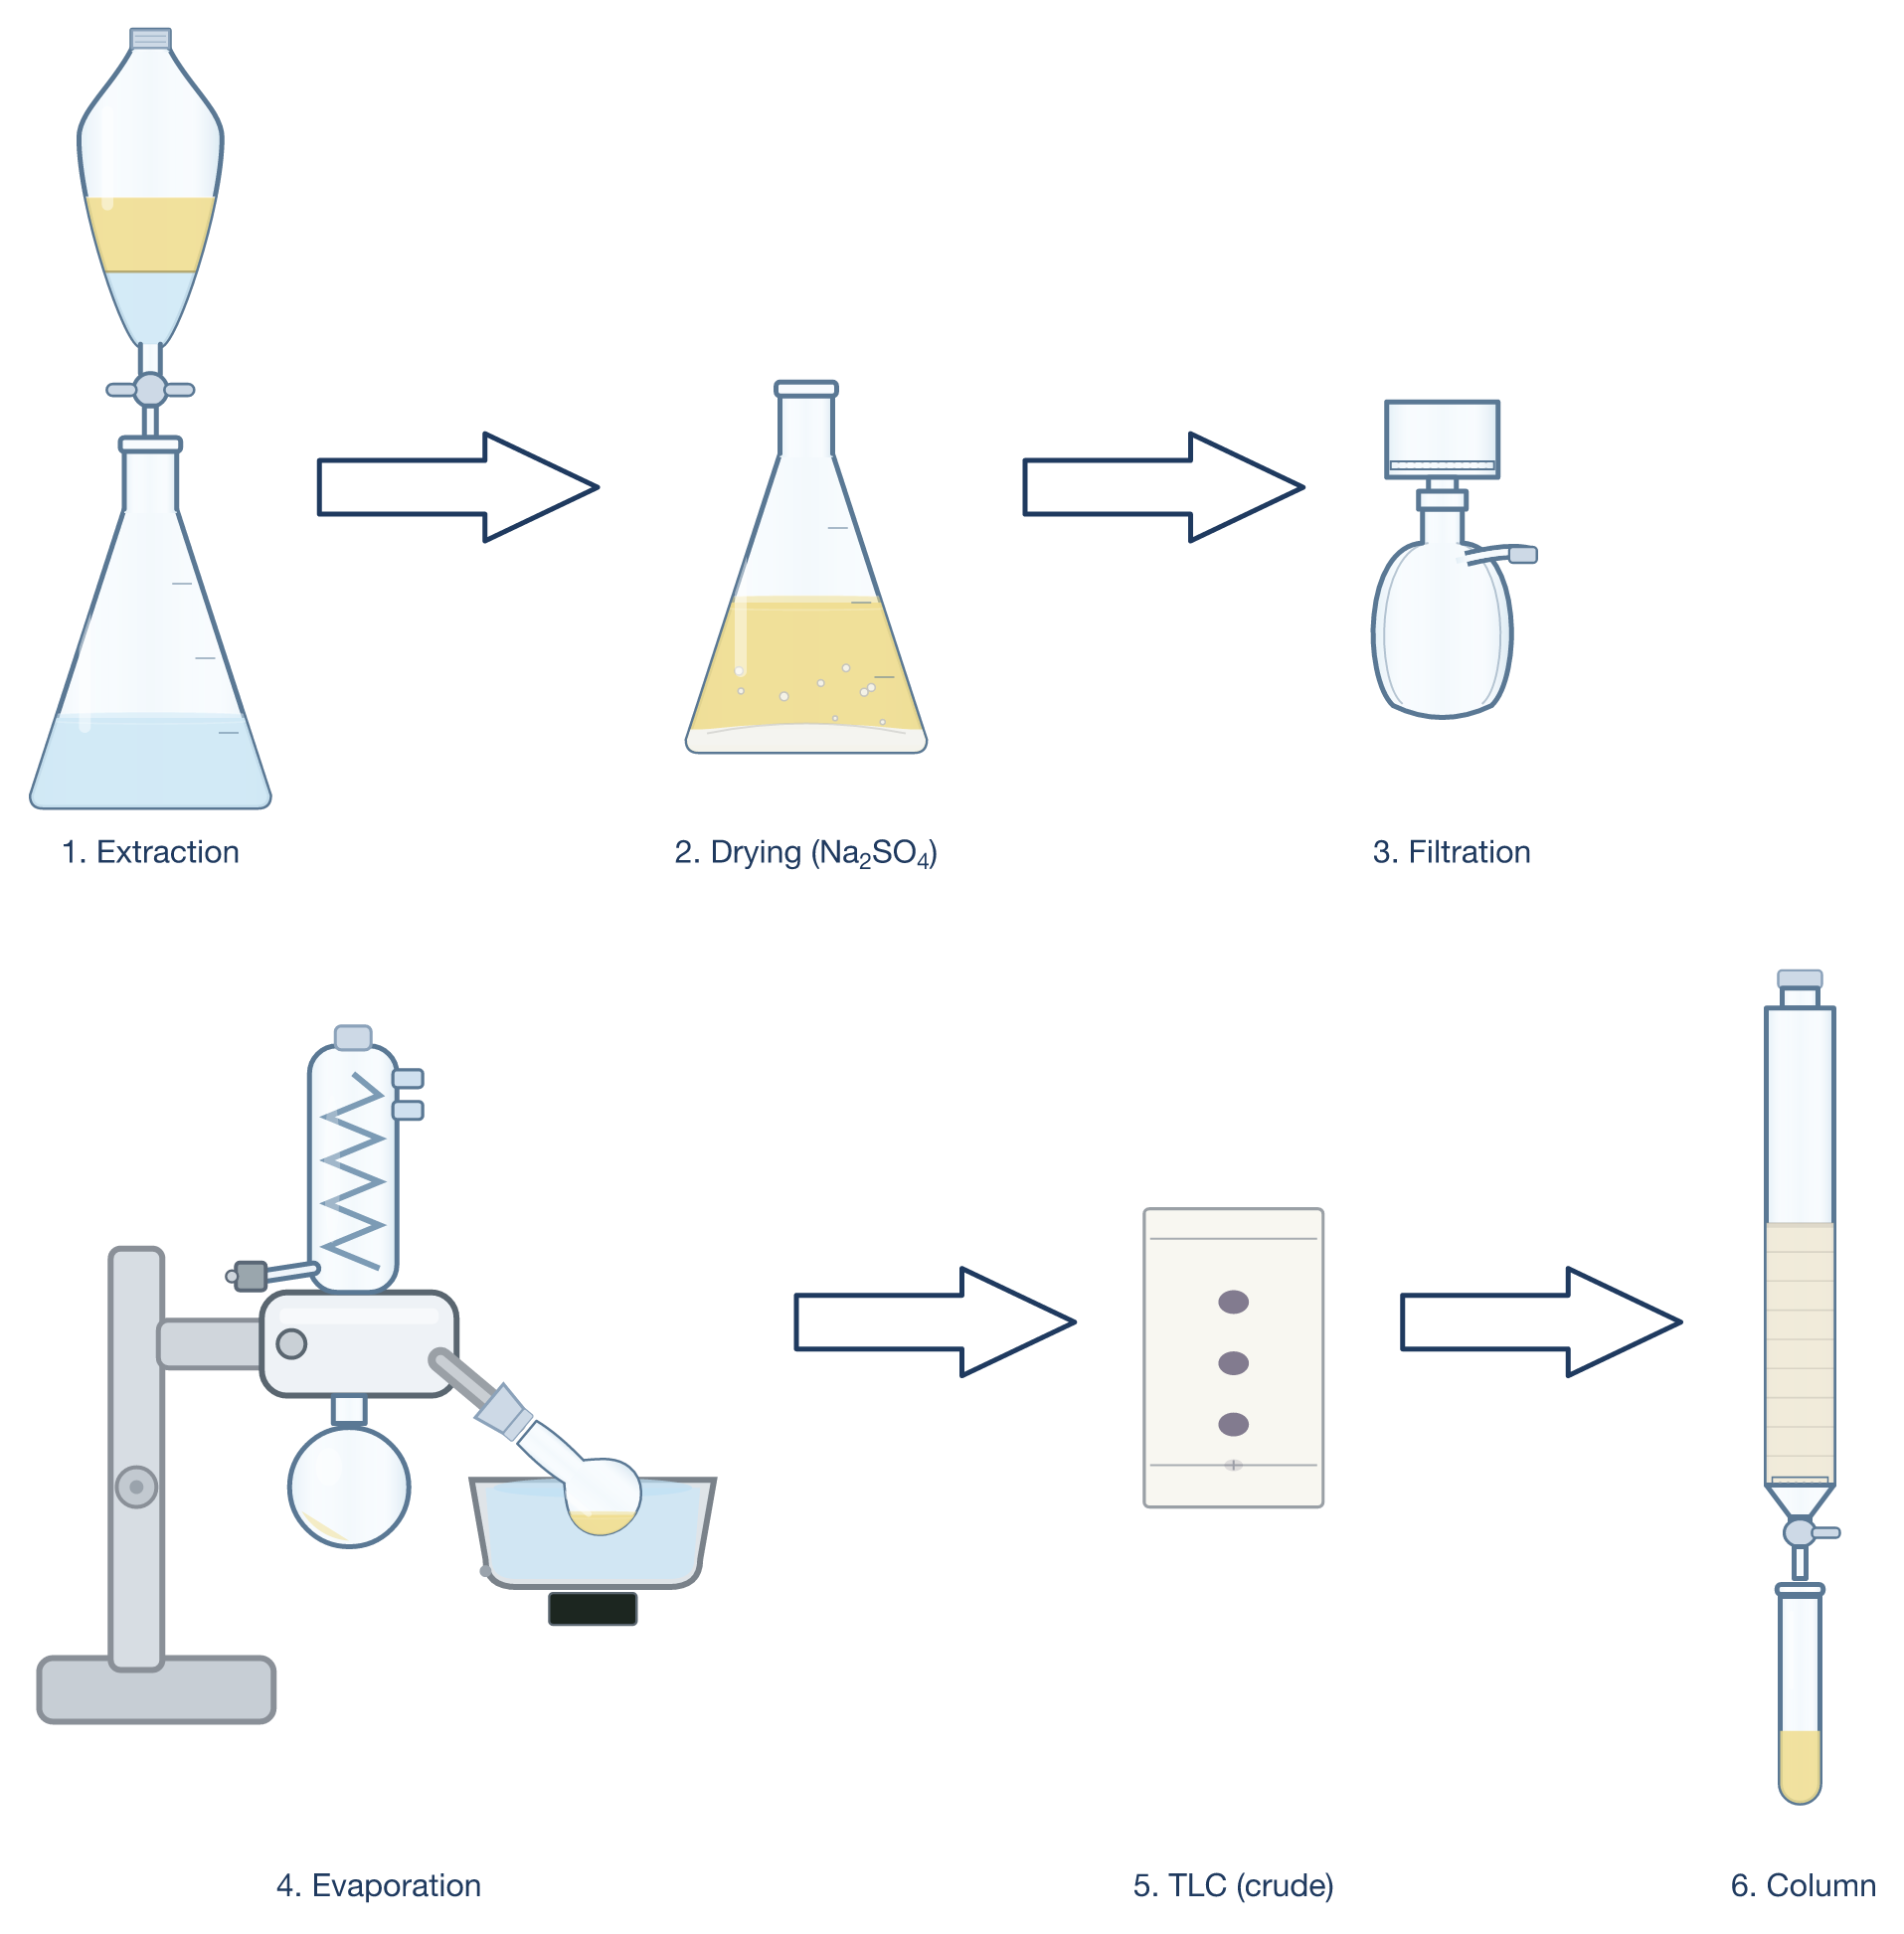
Free to use without attribution in lab reports, theses, teaching materials, slides, supporting information and on the web, including modified and commercial use. Released under CC0 1.0 (public domain dedication). A mention of “made with FlaskConnect” is appreciated but not required.
Equipment
- Separatory funnel
- Erlenmeyer flasks
- Drying agent (anhydrous sodium sulfate)
- Suction filtration (Büchner funnel and filter flask)
- Rotary evaporator
- TLC plate
- Chromatography column
- Test tubes
Setup tips
- Remove the stopper before draining the lower layer from a separatory funnel; with the stopper in, a vacuum forms and nothing flows. Which layer is organic depends on density (dichloromethane and chloroform are denser than water).
- Dry the organic layer over anhydrous sodium sulfate (or magnesium sulfate). It is dry enough when the drying agent stays free-flowing instead of clumping.
- Remove the drying agent by filtration (suction, gravity or a cotton plug).
- On the rotary evaporator, lower the pressure gradually to avoid bumping.
- Check the separation by TLC before running the column and pick the eluent (aim for an Rf of about 0.2–0.3 for the product).
- Collect fractions in test tubes and combine those that contain the product by TLC.
Common mistakes
- Trying to drain a separatory funnel with the stopper in.
- Throwing away a layer before confirming which one is organic (keep both until you know).
- Too little drying agent, so it stays clumped.
- Pulling full vacuum at once on the rotary evaporator so the solution bumps.
Always follow your institution's safety rules and your supervisor's instructions.
Watch it built
Building this setup in FlaskConnect (with narration).
Draw this in the app
This diagram was drawn in FlaskConnect. Pick the glassware and it connects itself, coolant lines and all, in a few minutes. Apparatus drawing and export (SVG, PNG, PowerPoint, Word, Excel) are free.