 FlaskConnect™
Home › Apparatus gallery › Vacuum distillation
Vacuum Distillation Apparatus Diagram (Cold Trap, Fractions, Labeled)
Vacuum distillation lowers the pressure so that high-boiling or heat-sensitive compounds distill at a lower temperature.
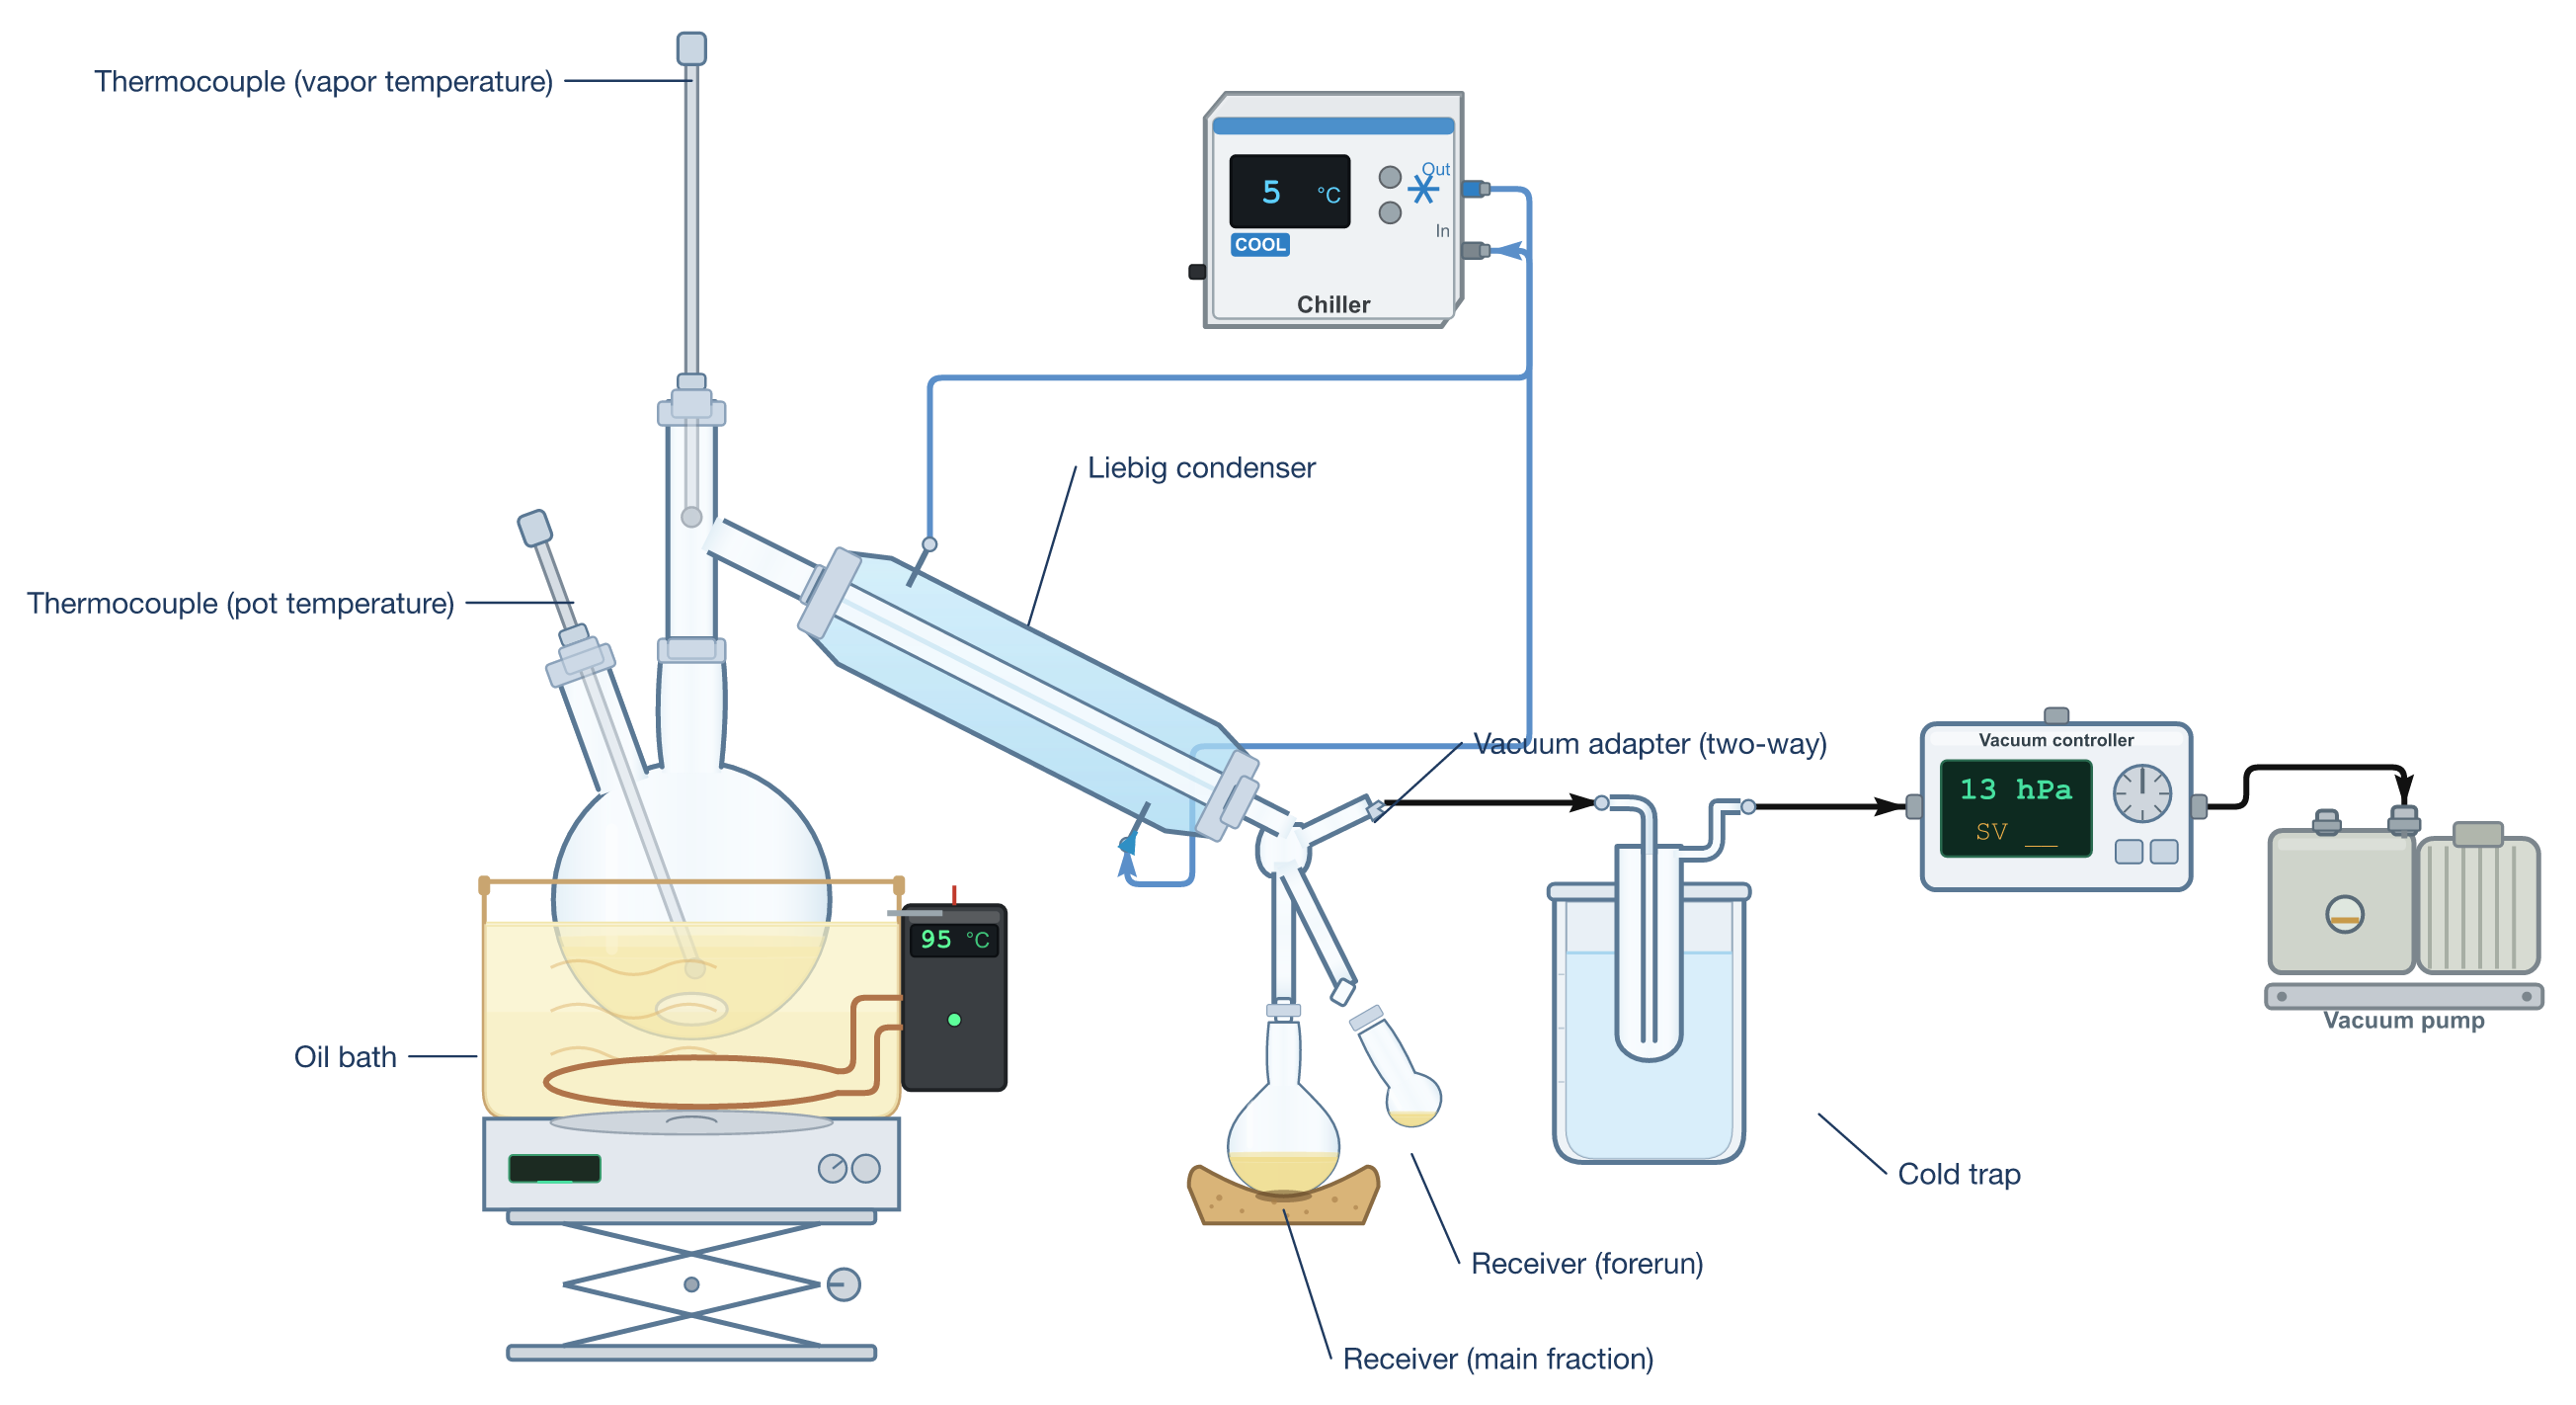
Free to use without attribution in lab reports, theses, teaching materials, slides, supporting information and on the web, including modified and commercial use. Released under CC0 1.0 (public domain dedication). A mention of “made with FlaskConnect” is appreciated but not required.
Equipment
- Two-neck flask
- Distillation head
- Thermocouples or thermometers (vapor and pot temperature)
- Liebig condenser
- Two-way vacuum adapter (switches between forerun and main fraction)
- Receivers (forerun, main fraction)
- Cold trap
- Vacuum controller (or gauge)
- Vacuum pump
- Oil bath, magnetic stirrer and stir bar
- Chiller
Setup tips
- Boiling chips do not work under vacuum (the air in their pores is pumped out). Stir with a stir bar, or bleed in fine bubbles through a capillary, to prevent bumping.
- Put a cold trap in front of the pump so solvent vapor never reaches it.
- Apply the vacuum first, then heat. To finish, stop heating and let it cool before slowly letting the air back in.
- Never use cracked or scratched glassware (it can implode). Use round-bottom or pear-shaped flasks; never evacuate Erlenmeyer or flat-bottom flasks.
- Use a two- or three-way vacuum adapter to switch receivers for the forerun and main fraction without breaking the vacuum.
- Boiling points under vacuum depend strongly on pressure. Record the pressure together with the head temperature (for example, benzaldehyde boils at about 62 °C at 10 mmHg).
Common mistakes
- Relying on boiling chips under vacuum (it bumps).
- Letting air in while the flask is still hot (bumping, suck-back, oxidation).
- Running the pump without a trap, so solvent ruins the pump oil.
- Evacuating an Erlenmeyer or flat-bottom flask.
Always follow your institution's safety rules and your supervisor's instructions.
Watch it built
Building this setup in FlaskConnect (with narration).
Draw this in the app
This diagram was drawn in FlaskConnect. Pick the glassware and it connects itself, coolant lines and all, in a few minutes. Apparatus drawing and export (SVG, PNG, PowerPoint, Word, Excel) are free.